In general, AirPods are supposed to be used with your iPhone. But, there are times when you would want to enjoy your favorite music and movies on a bigger screen. If you are someone who does most of their office work on a Macbook Air/Pro, you would certainly want to take it everywhere, and connecting the AirPods to it will come as a boon.
The easiest way to connect the AirPods to a Mac is first connecting them to your iPhone so they get linked to the same Apple ID. This way they’ll show up automatically on your Mac (if you are using the same Apple ID on your Mac and your iPhone) thus making the set up go faster.
In this article, we’ll discuss ways you can connect your AirPods/ AirPods Pro to your Macbook Air/ Pro, and the steps to take if some issue arises.
Connecting the AirPods to your Mac
Among the most attractive features of AirPods is the smooth pairing capabilities with iOS and iPadOS. These wireless earphones offer automatic pairing with iPhones and other Apple devices, as soon as you open up the case and fix them on your ears. However, when it comes to connecting them with your MacBook Air/Pro, the process gets a bit trickier.
If you are looking for ways to connect your AirPods to your Mac, here is what you need to do:
The manual process
Before you begin, there are some things you need to be clear on. Check which generation AirPods you have. If you have second-generation AirPods, you must have macOS Mojave version 10.14.4 or later, running on your Mac and if you have AirPods Pro, it needs to pair with macOS Catalina version 10.15.1 or later.
Once you have the compatible AirPods and macOS available, follow the steps:
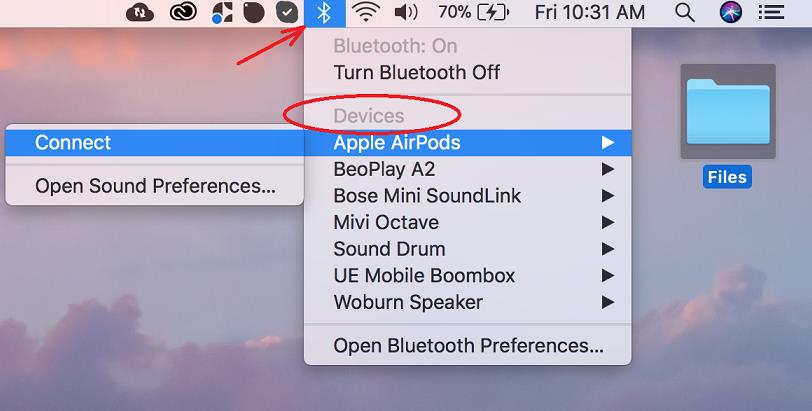
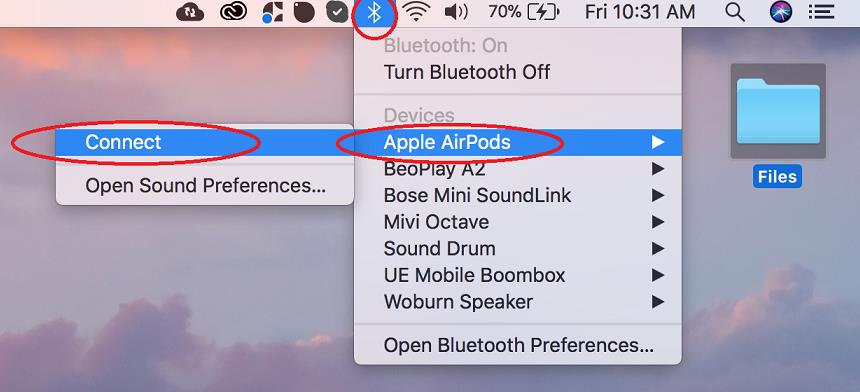
- Click the Bluetooth icon in the menu bar on the top right-hand side of the screen.
- Now, if you are using the same Apple ID on your Mac that you’re using on your iPhone, you’ll see the AirPods already listed in the devices section.
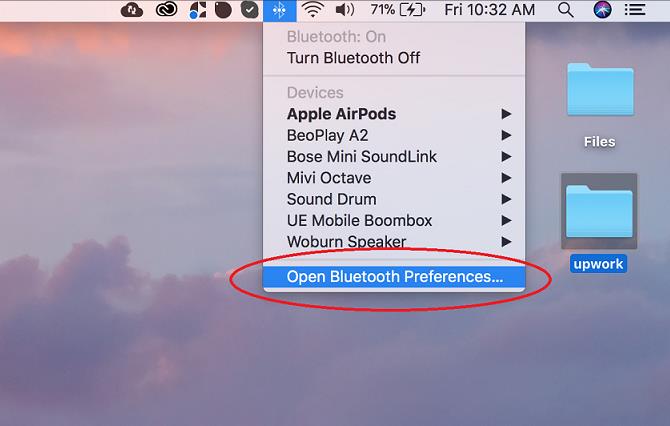
- If so, click on the “Connect” button. If not, click on “Open Bluetooth Preferences…” at the bottom.
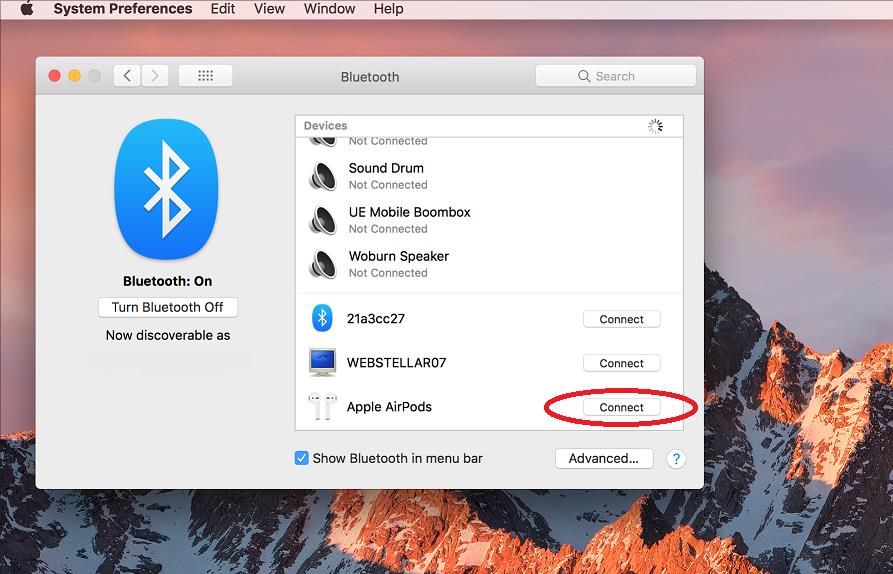
- Locate a white button on the back of your AirPods case and press and hold it until the LED on the case starts to flash white, thus making them discoverable for the nearby Bluetooth devices.
- As soon as the AirPods show up in the Devices section of the Bluetooth Preferences menu, click on the “Connect” button.
Your MacBook is now connected to your AirPods and you can enjoy your favorite music and movies.
Troubleshooting connection issues
While you are trying to connect your AirPods with your Macbook, you may encounter issues with error messages like, “Couldn’t connect to the device.” The error message either means there is some connectivity issue or some issue with the iCloud.
Follow the steps to alleviate the same:
- Head up to the Bluetooth symbol in the menu bar on the top right-hand side of the screen, and select “Turn Bluetooth Off.” Wait for some time, turn it back on, and try reconnecting to the AirPods. As soon as the AirPods show up in the devices section, click on the connect button next to their name. This will be all that is needed to fix the connection related issues.
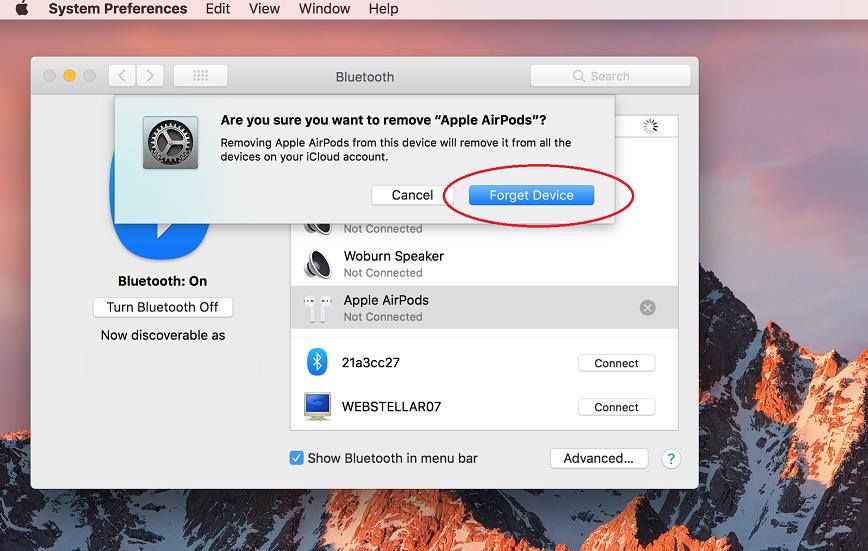
- You can also try disconnecting the AirPods using the “Forget this device” option in the “Bluetooth Preferences” menu, and then connecting them back again to see if the issue gets resolved.
- Turn off your AirPods and then your Macbook. Restart them both. This is another way you can clear up any connection confusion.
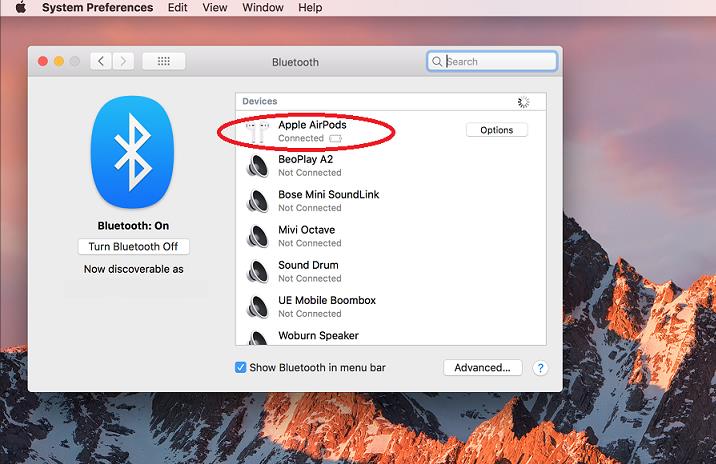
Using the steps mentioned above you can easily connect your AirPods with your Macbook Air/Pro. Once connected, the AirPods will show up with a connected message written just below their name, as shown below:
If you face any further issues, or if you know some other way to connect AirPods to a Macbook Air/Pro, do let us know in the comments section below.


