Have you ever stumbled on a bulk of information and you cannot just imagine yourself writing them down on paper? or perhaps, yours is a sketch of an art piece or picture of that tuxedo you want to purchase online for that dinner? Or that lovely dress you wish to order for that special someone in your life?
Whatever it may be, you would need a screenshot for all of those actions mentioned above. It’s pretty difficult storing several thousands of information in your head all at once– analog days are over so, wake up buddy!
Usually, I keep swipe files for every of my screenshot and why is that? for easy access, if you ask. You may want to try that also, it’s helpful.
Just if you do not know how to take a screenshot yet, here is a detailed and duly written article to guide you through the process.
For clarity’s sake, this article will be divided into two sections with the first section addressing the apple users and the second aspect for our Samsung buddies.
Let’s get started!
How to Take Screenshot on iPhone?
Taking screenshots on iPhone is not a herculean task – it’s as simple as eating that yummy slice of pizza. The following steps below can be used to successfully screenshot and save an image on your iPhone;
How to take screenshot on iPhone with face ID
Step 1: notice the side button and the volume up button and press at the same time to take a screenshot.
Step 2: A glance at the lower-left corner of your screen, you would find the thumbnail of your recently taken screenshot there temporarily.
Step 3: a quick tap on the image will enlarge the image for a larger view. At the top-most right corner, there are action icons listed in which you can either share the image screenshot, delete it or perform other actions.
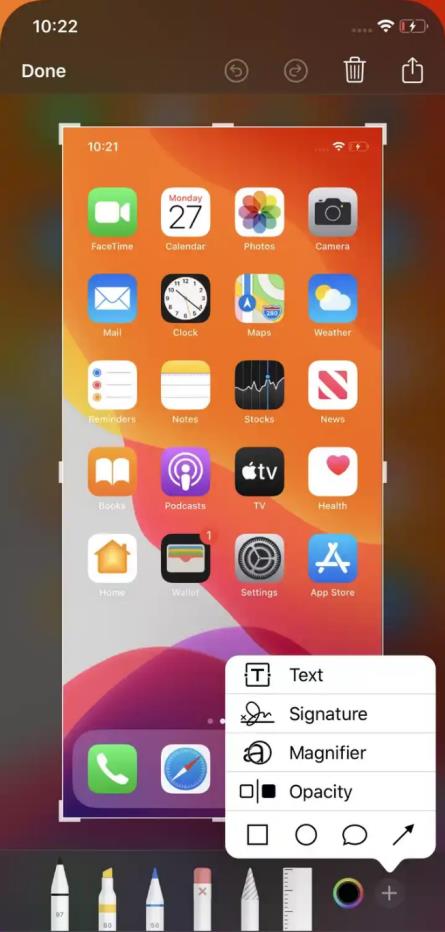
Also, you will find some tools for editing below to enable you to include highlights or mark it up. At the lower right corner, you will see a plus sign, select this sign to add text, signature, arrows or many shapes.
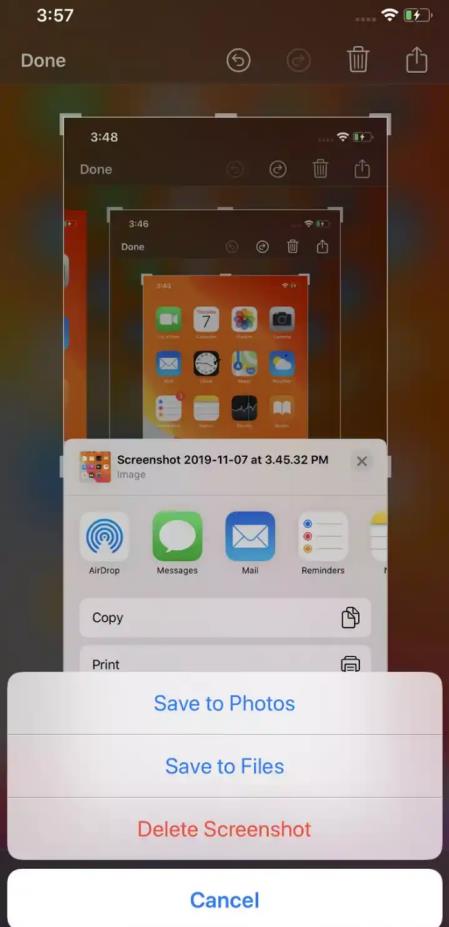
Once you are done with editing, at the upper left corner, you will find the “done” icon, click on it. You can choose to either save the image to photos or file. And if you wish, you can decide to get rid of it by deleting it.
iPhone models with Touch ID and side button
Although the steps are quite similar to the iPhone models with face ID, the only differing factor is seen in its first step;
Step 1: For buddies whose iPhone has a home button, do this instead: locate the side button and press simultaneously with the home button and quickly release both buttons to take a screenshot.
To avoid repetition, follow Step 2 and 3 above.
iPhone models with Touch ID and top button
In like manner, the steps are the same except the first step.
Step 1: Press the top button and home button simultaneously and quickly release both buttons to take screenshot.
Step 2 and 3 are pretty the same as seen above.
Screenshot location
Navigate your apps, find the “photos app” and click on it to open. Go to albums, then click screenshot.
Photos > albums > screenshots
How to Take Screenshot on Samsung?
It is super easy to take screenshots on Samsung in just 2 ways; either by using keys or by using motion gestures.
By using keys
By pressing the home button and the power/lock button at the same time, you can take screenshots. In turn, the screenshots taken will be copied to your clipboard and then saved to the screenshot folder in your gallery.
By using motion gesture
On every Samsung device, there exist a “palm swipe to capture screenshot” gesture. To enable or disable this feature: from the home screen on your phone, select the menu, then go to settings and proceed to click “my device”, click on motions and gesture then tap palm motion.
Home screen > menu > settings > my device > motions and gestures > palm motion
It is important to note that the settings menu type may be set to list view. In order to switch to tab view, from the settings menu, select the menu and click “switch to tab view.”
Settings > menu > switch to tab view
To enable the palm motion, toggle on the slider, it will turn the palm motion on immediately and vice versa to turn off the slider.
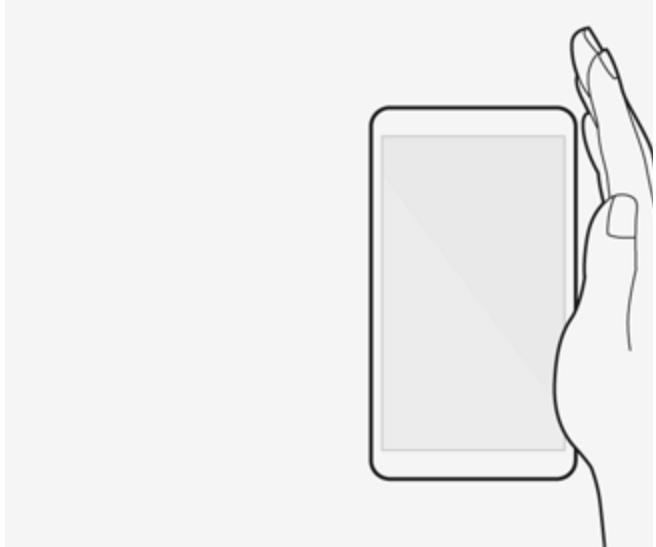
Also, you can take a screenshot by touching the screen with the side of your palm and taking swipe across the screen from left to right or the other way around.
You’ll have your screenshot copied to your clipboard and then saved to the screenshot folder in your gallery.
To view screenshots
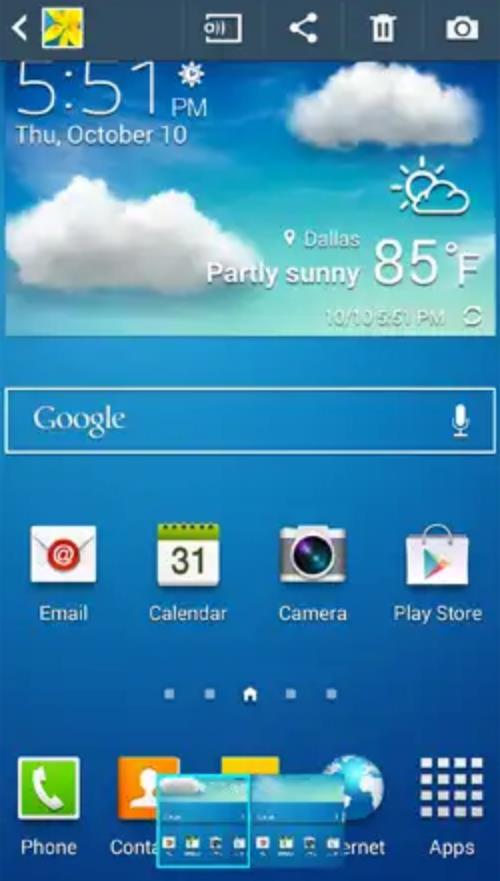
If you wish to view your screenshot as soon as it was taken, then do the following: swipe from top to bottom of your screen to open the notification bar, then tap on screenshot captured to view it.
On the flip side, if you choose to view your screenshot at a later time, follow the simple procedure below;
From your home screen, click on apps, then select app icon, gallery then select screenshots – you will find your screenshots there, just click on the one you wish to view.
However, there is an additional way to take screenshot on a particular Samsung model – Samsung galaxy by voice input
Using Bixby voice
To take a screenshot, press the Bixby key which is just below the volume buttons. If your device has been earlier configured, you can speak directly
Once, voice interface has been activated, just say the word – take a screenshot. Voila! It’s taken already.
On the whole, taking screenshots is easier than imagined. Experiment by taking one asap – it isn’t rocket science after all.


